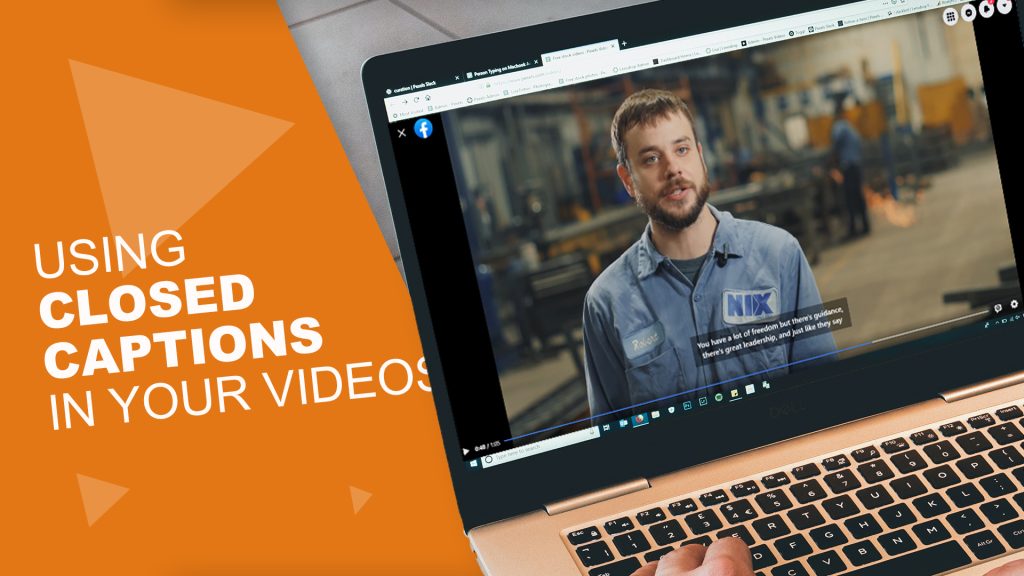
Picture this: you’re scrolling through Facebook or LinkedIn and a video catches your attention, but you aren’t in a great place to listen to the video. Maybe you’re in a coffee shop or at your open floor plan office. Instead, you read the close captioning that automatically is playing at the bottom of the video. If the story seems compelling, you’ll pop your earbuds in and start to listen.
According to Hootsuite, 85 percent of social media videos are watched without sound. What does this mean to you and your business? Easy. Make sure you include closed captioning or subtitles in your videos. There are three ways to include subtitles in your videos. You can hard embed them with graphics in your video. This means that they are always at the bottom and aren’t controlled by the platform your video is on. Secondly, you can use the platform you are on to auto-caption your videos. This means that you are relying on the software to spell and punctuate everything correctly. Or finally, you can upload your own closed captions to your videos. We actually do a combination of the second and third options here for most of our clients videos and this article will cover how we go about generating closed captions and uploading to each of our videos.
First, there is software out there that will produce subtitles or closed captions but this a free plus tried and true method that we use. Since most of our clients videos end up on YouTube for embedding, we use YouTube to auto-generate subtitles then we edit those subtitles to make sure spelling and punctuation is correct. After that, we download the SRT (SubRip) file and rename them with Facebooks SRT naming convention. Then we can use that SRT file to upload closed captions to Facebook, LinkedIn, and any other social media platform that allows you to upload SRT files.
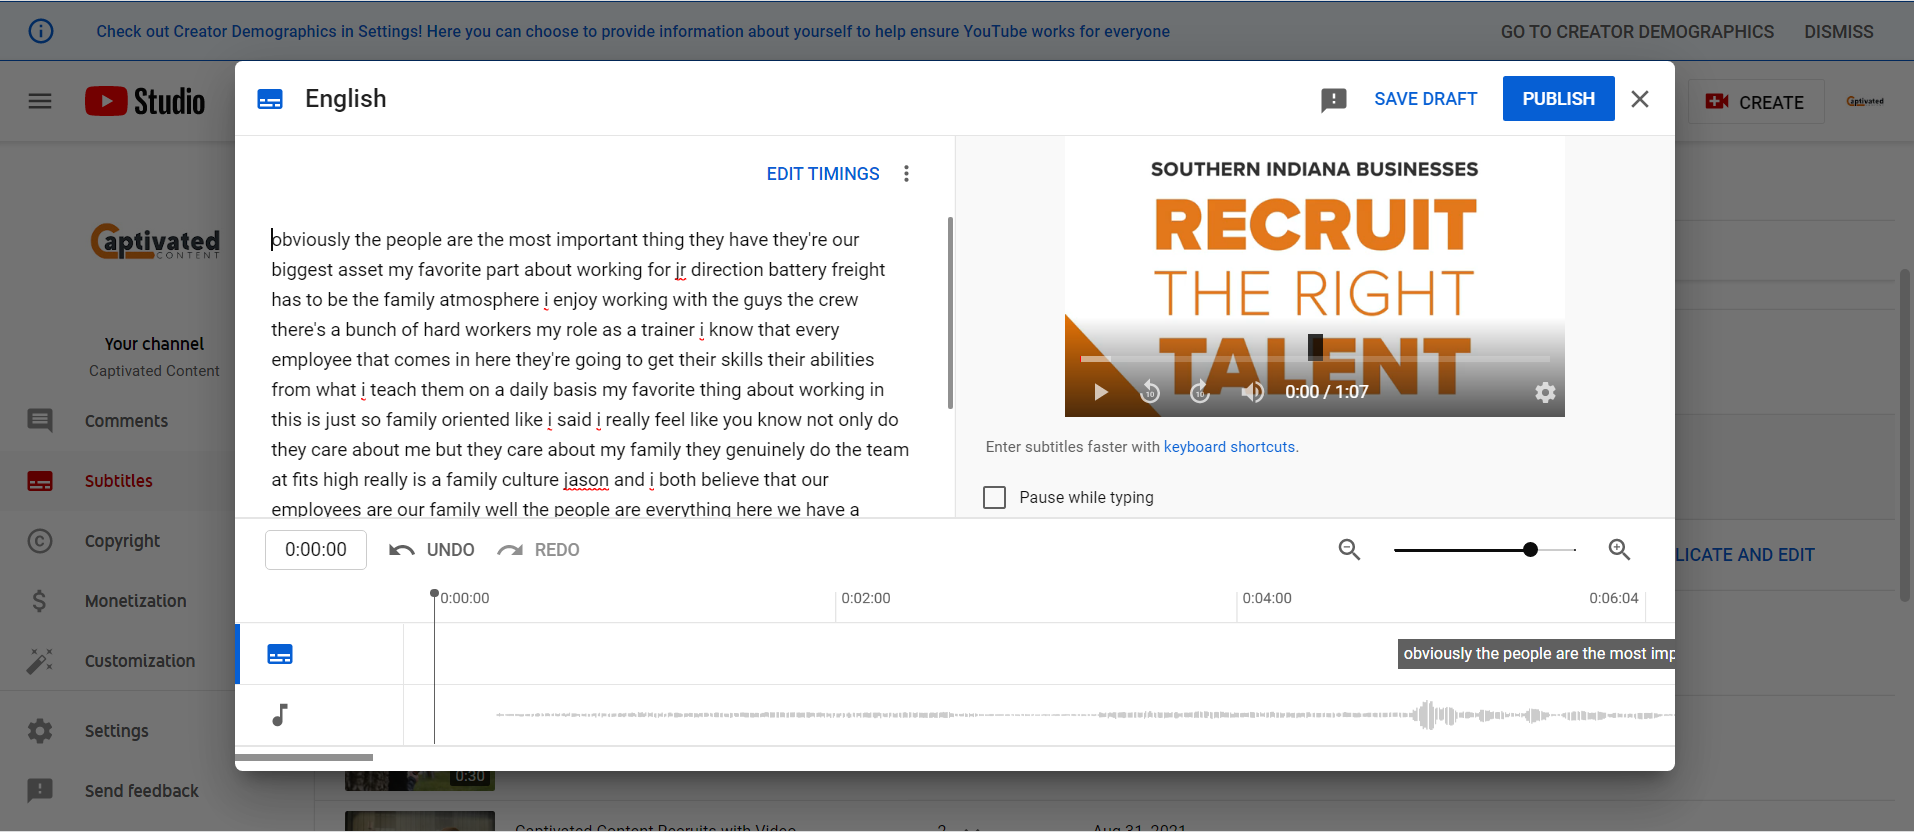
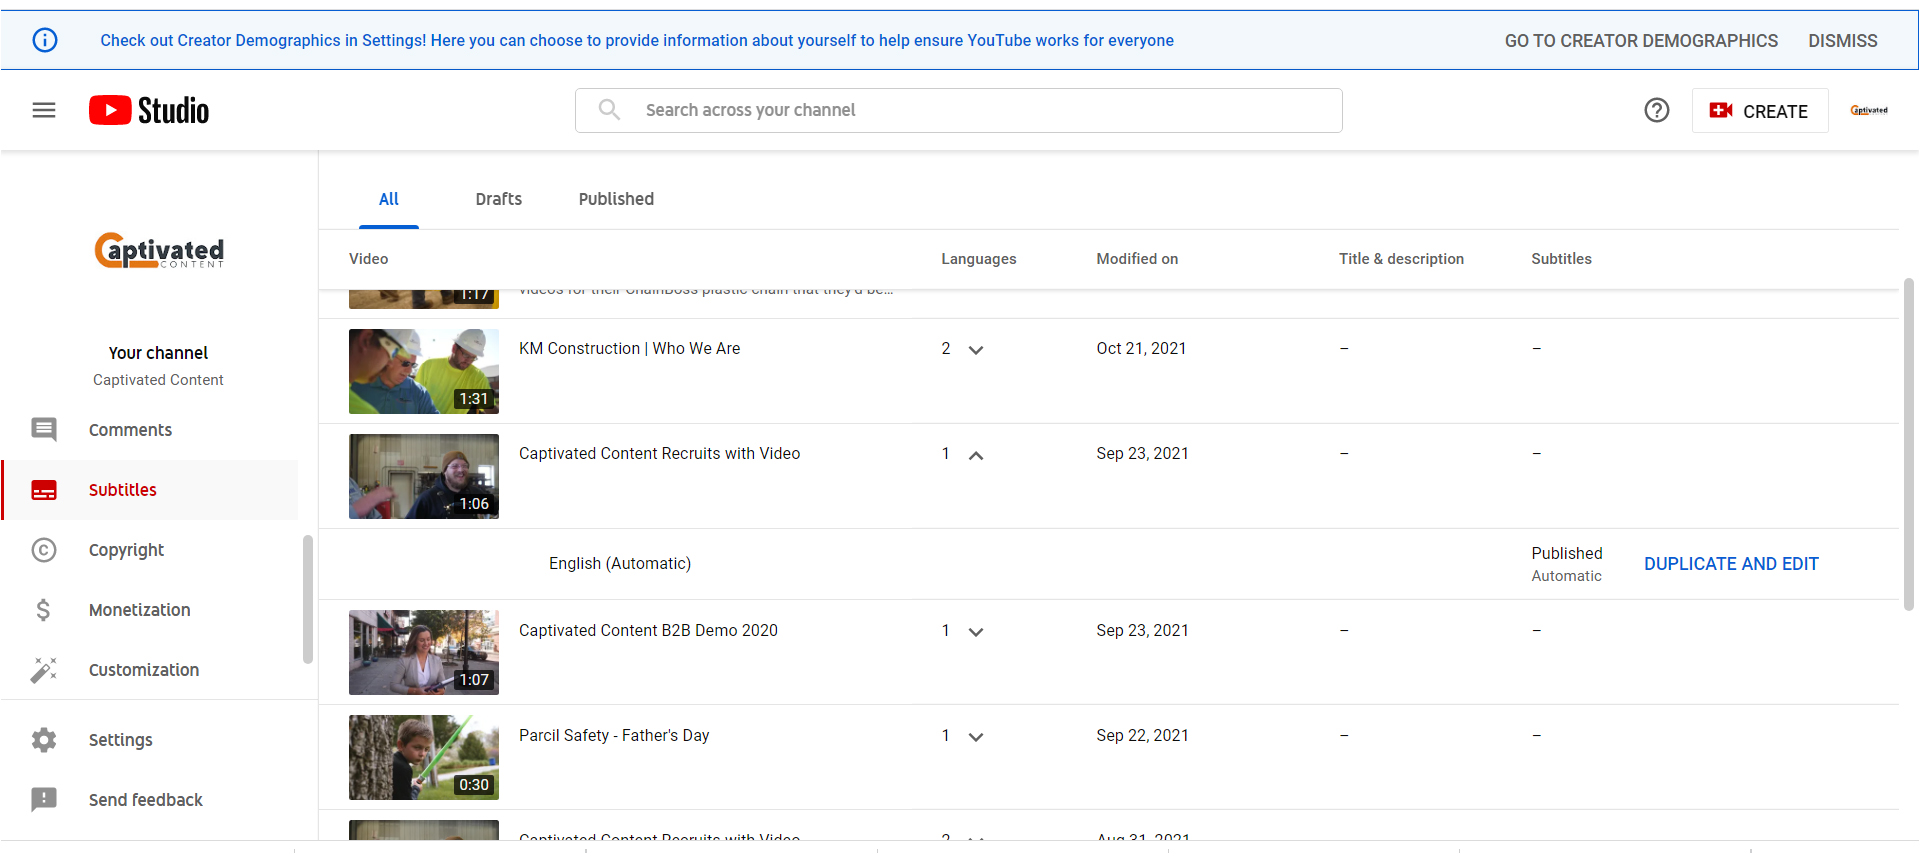
After your video is uploaded to YouTube, wait 15-20 minutes for your auto-english subtitles to generate. Click on your account image in the top right of YouTube and click YouTube Studio. Then click on subtitles from the menu to the left. Once you are on the subtitles page, click the video you want to edit subtitles. This will either take you to a page where it just shows the video with options like the screenshot below or it’ll first ask you what language you want subtitles. On the page similar to the screenshot below, click the three dots next to where it says “Published Automatic” and click “Edit on Classic Studio.” Here you’ll click edit in the top right corner. Now go through each subtitle card on the left, making corrections where needed. (Think about spelling, capitalization, and punctuation because these are all things the auto-generated CC will miss). After you have made your changes, click “publish” in the top right corner. This will take you to your subtitle page for that video. You’ll want to select the published subtitle named “English.” Once you get to this page, instead of clicking edit, you’ll hit the drop down on the actions button on the left and select .srt under the download heading. After you’ve downloaded your .srt file, you’ll want to rename it “Video Name_en.us.srt.”
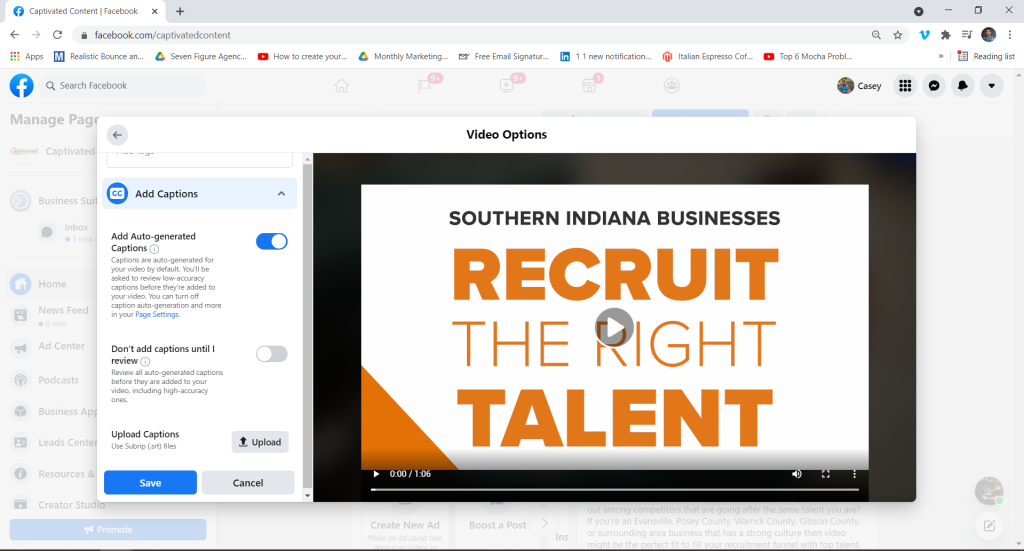
You can either use the Creator Studio on Facebook to upload and schedule your Facebook video or you can go to your Business Page, click video on the new status update and add your video that way. You may have to click on Video Options to edit your video. Here you’ll add your title, description, tags, and thumbnail just like YouTube. You’ll see in the screenshot below that Facebook’s video upload is pretty easy to follow and there is a place for you to upload your .srt file for subtitles.
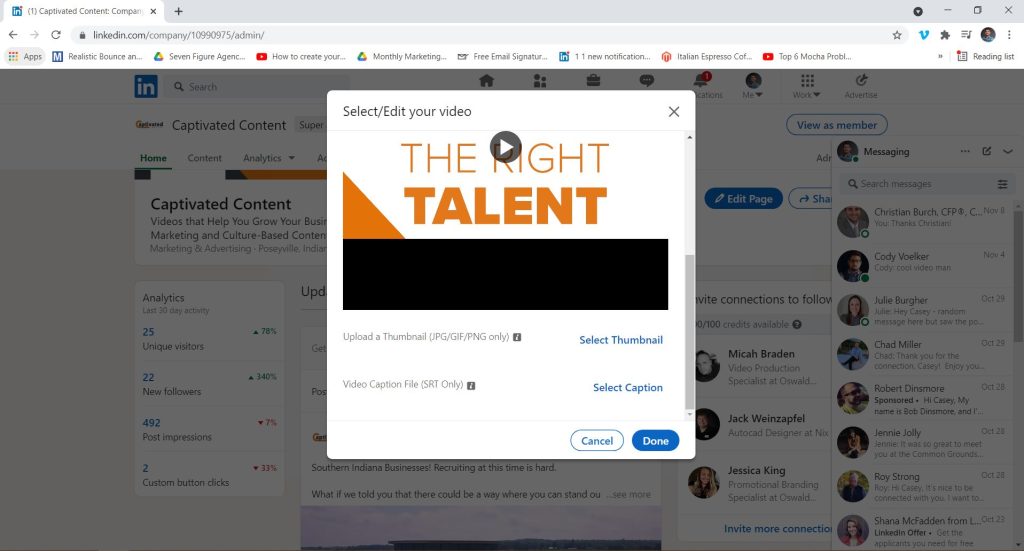
LinkedIn is the easiest of the three when uploading a video. Go to your LinkedIn Business page, and on the new status bar, click the video icon, select your video, then click edit in the top right corner of the video. Here you will add your title, subtitles, and thumbnail. If you don’t upload a thumbnail, your video will default to the first frame of the video. You CANNOT add subtitles or a thumbnail after you publish your post on LinkedIn so do this first when uploading.
Uploading subtitles or closed captioning might not seem like a big deal, but with so many of today’s social media users choosing to watch videos with no sound, you are missing out on opportunities to engage with them the way they want to be engaged with. Using closed captions can help you reach more viewers and potentially more customers.
If you are interested in working with us on your next video project or are ready to learn more about bringing video marketing into your overall marketing strategy please feel free to contact us.
We’re always open to chat about anything marketing, video production, or digital strategy! We’d love to talk!